Oh, Halloween. What a great excuse to make a costume. Three years ago I made a version of Bubblehead Nurse and last year Miss Samara “Well” Morgan. This year by project is Baby Jane Splicer from Bioshock. I’m doing an early concept art version from the character, because I just find the messy red hair more appealing that the black bob.
Because I’m constantly looking for different ways to make hard props, I thought to try something new when building the meat hooks for Baby Jane. The basic construction method is pretty common, pulp board skeleton with foam cover, but the finishing is slightly different. (Read: constantly looking for ways to eliminate sanding.)
First thing to do before the build is to define the shape of the hooks. I could have studied the references before cutting the skeleton, but I trusted my memory, which again proved to be little off. My handles are like 0 when they should be like D. But I chose to let it pass this time, because the costume is not for competition purposes, only for fun.
1: The pulp board
I made the skeleton from two parts; hook and handle. The design of the hooks is pretty bulky, so I chose the width to be about 1,7 cm. One centimeter diameter would have made the hook look too frail and 1,5 was not enough, but with two centimeters it would have been just huge, at least for a lady character. I don't really know why I ended up with 1,7, it just worked.
 Before gluing the pieces together, the shapes are traced on insulation foam. Both parts two times.

After I had cut the pieces, I sliced a slit on the hook and glued it to the handle. The structure may seem floppy at this point, but when the foam is added there will be more support on the cross part.
2: The foam
I used 2 cm thick insulation foam. The traced pieces are cut out. First the handle parts are glued. Then small slits are cut so that the crossing parts are sealed underneath. The sandwich is taped together. The glue needs to dry before anything else can be done.
 Then it’s time to start cutting away the excess foam. I used a carpet knife and naturally cut myself during the first few minutes. So use gloves to protect your precious fingers, because sharper the knife is the neater the result will be. With dull blade you just end up ripping the foam.
 The pulp board works as a guideline when the foam is cut round from the both sides. Some of the height needs to be taken away, because the hook should be 1,7 cm diameter all around. It’s better to cut less than more. The shape is finished with fine sand paper.

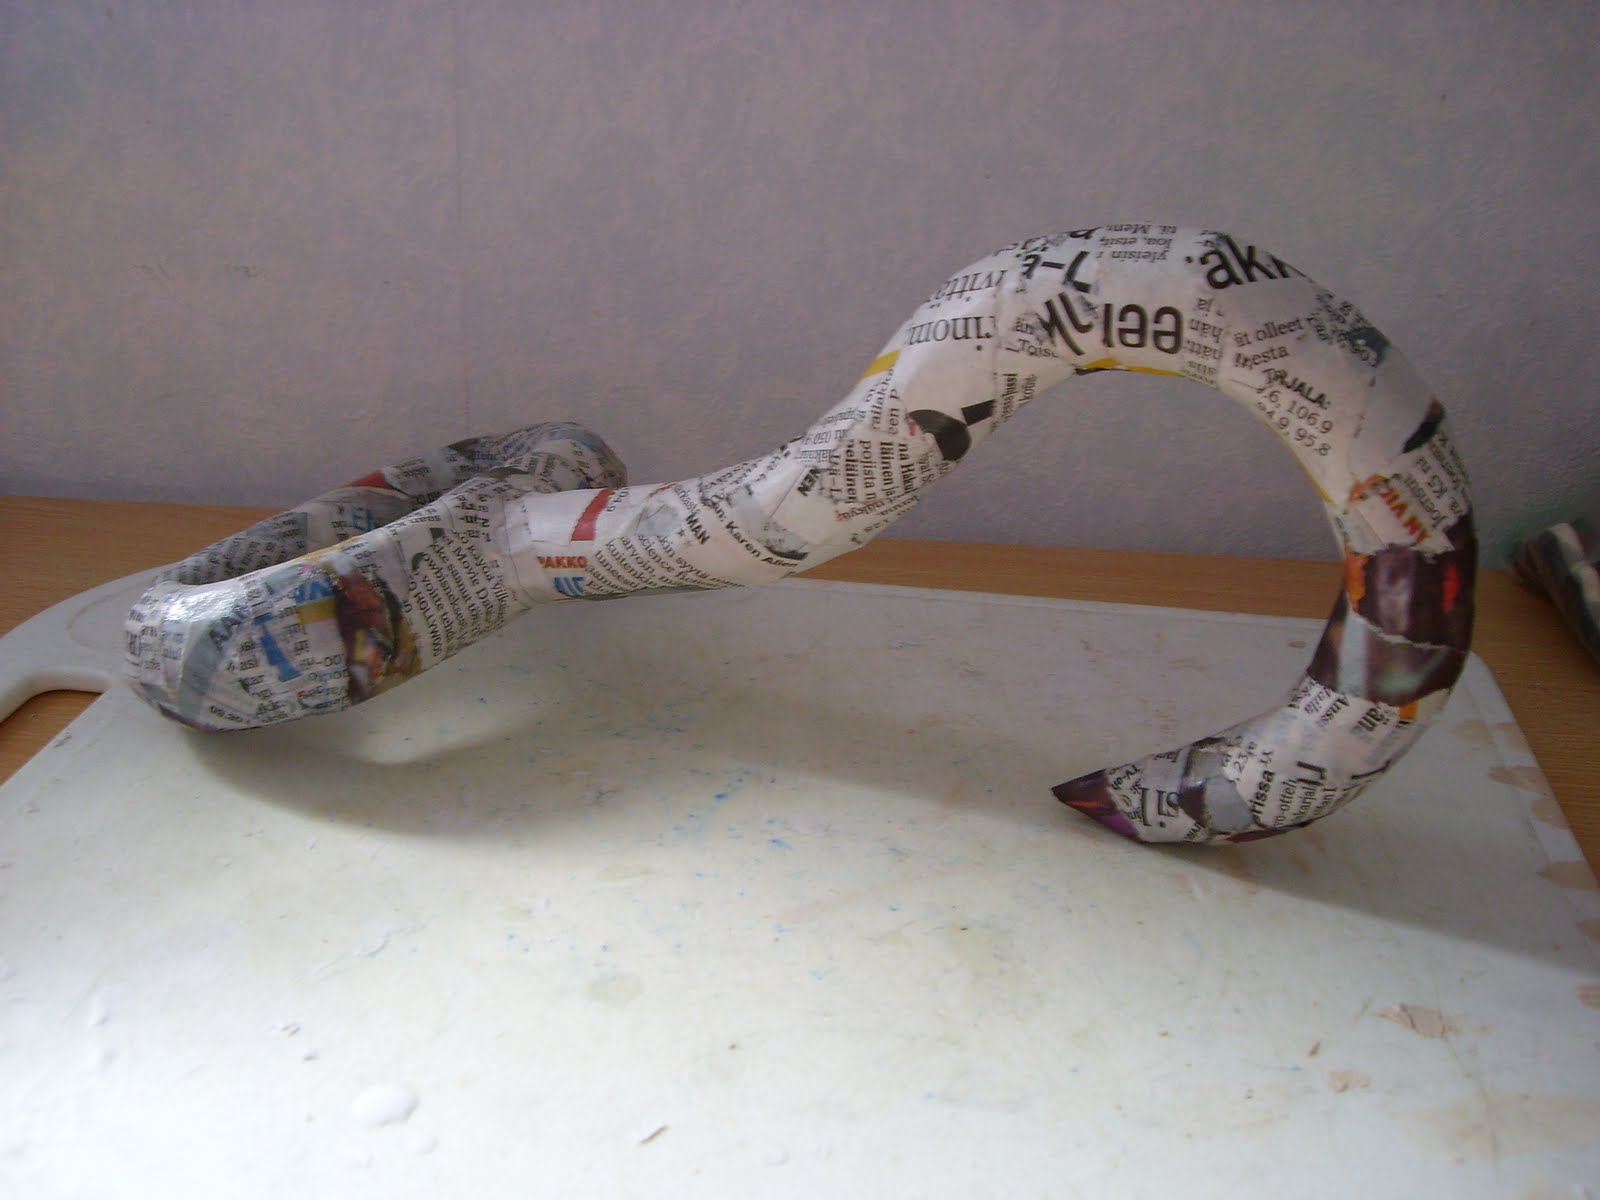
3: Paper Mache
You can use any adhesive you like for this. I just simply mixed together glue and water until I got the consistence I was happy with. It’s always best to start with glue and add water little by little. Ripped pieces of newspaper are dipped in the adhesive and laid on the foam. On curves the pieces need to be small so that they sit properly. Two to three layers will do.

I normally avoid this enforcement technique, because I never seem to get the surface as smooth as I would like to. But because the meat hook can look rough, the few bumps I was able to create didn’t bother me.
4: Coating
For the coating I used water, glue and wood putty in form of a goo. Goo in this case means a spread that is liquid enough to be applied with a brush, but also pasty enough so that it doesn’t drip. I went with gut feeling and didn’t measure anything. I still have to do the other hook, so I try to take notes and add information later about the amounts. The goo will last for few days under plastic.

The goo is spread thinly on the hook. Each layer should be dry before the next. I think I made three to four layers in total. And then it’s done; a meat hook to be painted and weathered.
Notes:
I’m going to paint my hooks with acrylics and will post photos of them when they are done. For the construction; you could use expanding foam instead of insulation foam. The finish could be just putty, but you would probably need to sand it. And if you hate sanding and refuse to do it, you could skip it with the insulation foam; your hook might only look rougher in that case.
 In our version of Barriss’ costume there is seven different pieces; cape, scarf, cowl, dress, belt, shoes and lightsaber. I’ve seen other costumers and cosplayers with different solution. Some have done separate shirt and skirt or cowl attached to the cape itself. You can’t really tell how the costume is constructed when it’s on, so I went on with a way that was most suitable for us and my way of costume making.
The cape fabric was something we really searched for. Finally we accepted this synthetic fiber mix we found from local fabric store. It has velvety or brushed cotton type surface, but the inside looks like what you would use in a shell suit. Gladly, the printing emulsion worked on the synthetic fabric. We used a stencil roughly a size of an A4 sheet and used pearly blue and silver opaque colors from EMO-tuotanto. Needless to say, the process took days! Still it was bit faster than printing Luminara’s cape.

The cape is pretty much straight pieces of fabric. The back is gathered to eight large folds, which I sewed on a shoulder panel. The front is double layered and lifted from the front to the tip of the shoulder and sewed on place. The hood is patterned rather freely, it’s supported by iron on backcloth and the whole thing is lined with black acetate. The cape has hidden hook fastening on the front.

The scarf is actually my old “pashmina” scarf I bought for few pounds from London. I just cut it in half and thus sacrificed it to cosplay goddesses.

The cowl is sewed from leftover pieces of the cape. It fastens with hooks on the back of the neck.
The dress has four different fabrics on it. The top layer of the shirt is made from two crinkled and detailed tricot fabrics. As a lining is used lycra tricot on the bust in two layers to prevent transparency. The hem is made from heavy knit fabric with 5% elastane to ensure decent fall and flow. To make the look on the middle section of the bust according to references, I sew pin tucks for more detailed look.

 The hem is half circle as the upper part of it is more or less like a tube. I sew the shirt part and hem part separately and joined them as a last step. If I wish to change the hem, the cut on it is slightly lower than the reference because in my mind it fitted Yoki’s physique better, then I can do it easily without having to seam rip the sides.

Yoki made the belt buckle from pulp board, craft foam and some yarn. Here is a link to a post she made about it. The belt is made the same way as Luminara’s; with brown pleather on top and awning fabric on the back to give support. Barriss’ belt is little darker than Luminara’s, so I used a sponge to rub dark grey acrylic paint thinly on the pleather. It actually worked really well. The acrylic set on the pleather nicely and didn’t crack even if I tried stretching it.

The black boots were found from same second hand shop as Luminara’s. There are five decorative buckles on the sides and reasonable heel to walk. Price for the boots was something ridiculous, like ten euros.

The lightsaber Yoki made from pulp board tube this time from plastic wrap container, craft foam, putty, black electricity tape, silver spray paint and finally screws and plaster buttons as details.
Long time, no upload on our Youtube channel... Until now! Almost after a year of the completion of my Samara costume, I put on my best decayed make-up and headed out with Yoki in hunt of wells.
What if Samara lost her wells? Head here and find out!
Craft foam must be one of the most versatile materials there is when it comes to cosplay. I’ve used it before on Mayuri’s hat structures, in Sasori’s puppet body to imitate wood and for leathery look on Luminara’s waist cloth and armguards. And in one or two costume projects I’ve used it in details. But when I started to brainstorm our costumes for WCS preliminaries, I came to realize that I would build armor for my character entirely from craft foam. Thankfully, Ivy only has pieces of armor on her arms and shoes, but never the less; I was in for a challenge.
Even if I hadn't done any myself, I had read about making craft foam armors. This craft foam armor making tutorial is one of the firsts I bumped into years ago and I think it's possibly one of the most referred one out there. The steps on the tutorial are almost the same with how I made my armor with few differences on materials used.
 One thing about Ivy’s armor is really convenient; all the pieces are more or less symmetrical. If you look at the upper arm piece, it looks the same whether you look at it from the front or the back. With the forearms and upper arms I could make one pattern and use it on either arm without problems.
And with patterns I started the project. After I has sketched the armor based on references, I used regular paper to define the sizes and shapes of the armor pieces. Everything else was rather easy to do, but for the breast plate I asked Yoki to aid me.

 I traced patterns on 2mm craft foam and supporting parts of the breast plate from 5mm craft foam. Behind each craft foam piece I glued slightly smaller piece of fiber fabric, sturdy cotton stiffener used in upholstery. This gives good support to the piece itself and will prevent bending better than regular fabric would. Inside the breast plate I used cups from old bra. This made the whole construction process lot easier, because I already had right shape and size to build the armor on.

 Breast plate details.


There are some sharp angles on Ivy leg armors. Craft foam tends to reverted after bending, so some heat is necessary to forge it. I used hot-air blower to warm up the foam before pressing the folds on the ankle and shoe parts. I also used heat to create the knuckles on the hand plates, curves on the forearms and the plump on the upper arm. You don’t need to heat the foam long; few seconds with hot-air blower will make the foam moldable.
 After gluing the raised pieces, back support and sanding the putty smooth, I applied few coats of gesso on each piece to seal the foam. Lastly I made a glue-water mixture and applied it with a brush to harden the surface. The glue also works great to create glossy finish for the piece.

 As primer I used grey spray primer from Prof. The paint I used was silver chrome finish from Bravo Spray. I also planned to age and weather the pieces with acrylics, but the time was against me. Well, something to do before next wear!


The small brooch details could also be counted as part of Ivy's armor. I cut the base shape from pulp board and sculpted the shape from modeling material similar to Das modeling clay. After I let the thing dry, I gave it few coats of glue-water and painted then the same way I did the rest of the armor.
The fastenings on the armor are pretty much elastic band and Velcro. I glued the tips straight to the base shoes with Erikeeper. If you glue Velcro straight to craft foam or any other smooth surface it will not hold that well. I solved the problem by backing the Velcro up with something, this time to scrap tricot I had lying around. The fabric will give the glue nice surface to grip on.
In short, the hand plates fasten to the gloves with Velcro, the forearms close with Velcro, the upper arms hang on with elastic band, the breast plate fastens to the dress with Velcro from the sides, the rings on the ankles close with Velcro and the ankle plates you hardly saw me wearing at Tracon, because they were uncomfortable as they could be, also fastens with Velcro. The brooches hold on with safety pins glued on the backsides.
 I’m rather happy how the armor turned out if the shoes are not counted in. Before I’m going to take Ivy to any convention, I’m going to redo the whole leg set and pay more attention to patterning the tips of the shoes. I also need to pad the heels themselves. They are too big for me, which made my walking look like duckling steps.
 Few bumps on the road; trial and error with hand plates.