Showing posts with label props. Show all posts

March 22, 2013

Journal for time travelling Doctor


When I was wearing my lady Doctor costume at Desucon last month, I got few questions regarding my Tardis journal and its construction. I realized that I had only posted one photo from the journal at its finished state but non from the crafting phase. This goes especially for that sweet girl who demanded me to teach her how the journal is made.

I found quite many tutorials of how to make the journal from binding the book to covering a readymade product. Of course I searched them up after I had almost finished my journal. The basics were the same, but I could have chosen a better material for the covers. I went with basic sheet cotton and it only came to my mind that it would probably not stretch enough to set neatly on all the small gaps and slots on the design when I had glued half of it on. So my journal represents the rugged type with water damages.

If I had read the internet tutorials before hand, I might have used a different material. For example tissue paper with decoupage technique. Just genius!


The base for my journal project was notebook I found from a local bookstore for few euros. With reference pictures of River Song’s journal I cut craft foam according the design and glued the pieces on the book. First I thought of using cardboard, but went with craft foam because it’s lot easier to cut. I added the “bindings” on the back and secured them with fabric before covering the whole thing.


I spread glue-water mixture on the cover and quickly worked the cotton on it. I used the end of my paintbrush to press the fabric on the slots. At this point I realized that I had chosen the wrong material, but decided to keep going as I could try to figure out how to fix the issue later.


After I had brushed glue also on the top of the fabric and the cover had dried, I took an exacto knife and sliced the slots that seemed too shallow. These slits I could easily fade away at the painting phase.


Then I glued the back and the back cover of the book. Before the glue set I made sure I can actually open the journal.

The seam allowances I glued on the inside of the covers. To hide the raw edges I glued the first paper page over the allowances and checking that the book can still be opened afterwards.


For painting the book I used blue, white and grey acrylics. I think I mixed four to five different shades to give the book three dimensional look, because of the shallow parts on the design. I used generous amounts of paint to seal the surface and to give the journal leathery look.

May 25, 2012

Towels and stuff


For the celebrations of annual Towel day, we got geared up the proper way.

 It always comes back to the sanding paper.


What do you mean 'I have no fashion sense', this is a perfect working gear.


Hiron changed her mind about spending Desucon Saturday in casual clothes. She dug up a costume project which she started about two years ago. Mireille Bouquet, codename Noir. High ranked assassin and a fine woman... except her purse is really... pink.But Hiron made it, because she loves bags almost as much as hats and headpieces.

October 7, 2011

Meat hook for Spider Splicer

Oh, Halloween. What a great excuse to make a costume. Three years ago I made a version of Bubblehead Nurse and last year Miss Samara “Well” Morgan. This year by project is Baby Jane Splicer from Bioshock. I’m doing an early concept art version from the character, because I just find the messy red hair more appealing that the black bob.

Because I’m constantly looking for different ways to make hard props, I thought to try something new when building the meat hooks for Baby Jane. The basic construction method is pretty common, pulp board skeleton with foam cover, but the finishing is slightly different. (Read: constantly looking for ways to eliminate sanding.)

First thing to do before the build is to define the shape of the hooks. I could have studied the references before cutting the skeleton, but I trusted my memory, which again proved to be little off. My handles are like 0 when they should be like D. But I chose to let it pass this time, because the costume is not for competition purposes, only for fun.

1: The pulp board

I made the skeleton from two parts; hook and handle. The design of the hooks is pretty bulky, so I chose the width to be about 1,7 cm. One centimeter diameter would have made the hook look too frail and 1,5 was not enough, but with two centimeters it would have been just huge, at least for a lady character. I don't really know why I ended up with 1,7, it just worked.


Before gluing the pieces together, the shapes are traced on insulation foam. Both parts two times.


After I had cut the pieces, I sliced a slit on the hook and glued it to the handle. The structure may seem floppy at this point, but when the foam is added there will be more support on the cross part.

2: The foam

I used 2 cm thick insulation foam. The traced pieces are cut out. First the handle parts are glued. Then small slits are cut so that the crossing parts are sealed underneath. The sandwich is taped together. The glue needs to dry before anything else can be done.


Then it’s time to start cutting away the excess foam. I used a carpet knife and naturally cut myself during the first few minutes. So use gloves to protect your precious fingers, because sharper the knife is the neater the result will be. With dull blade you just end up ripping the foam.


The pulp board works as a guideline when the foam is cut round from the both sides. Some of the height needs to be taken away, because the hook should be 1,7 cm diameter all around. It’s better to cut less than more. The shape is finished with fine sand paper.


3: Paper Mache

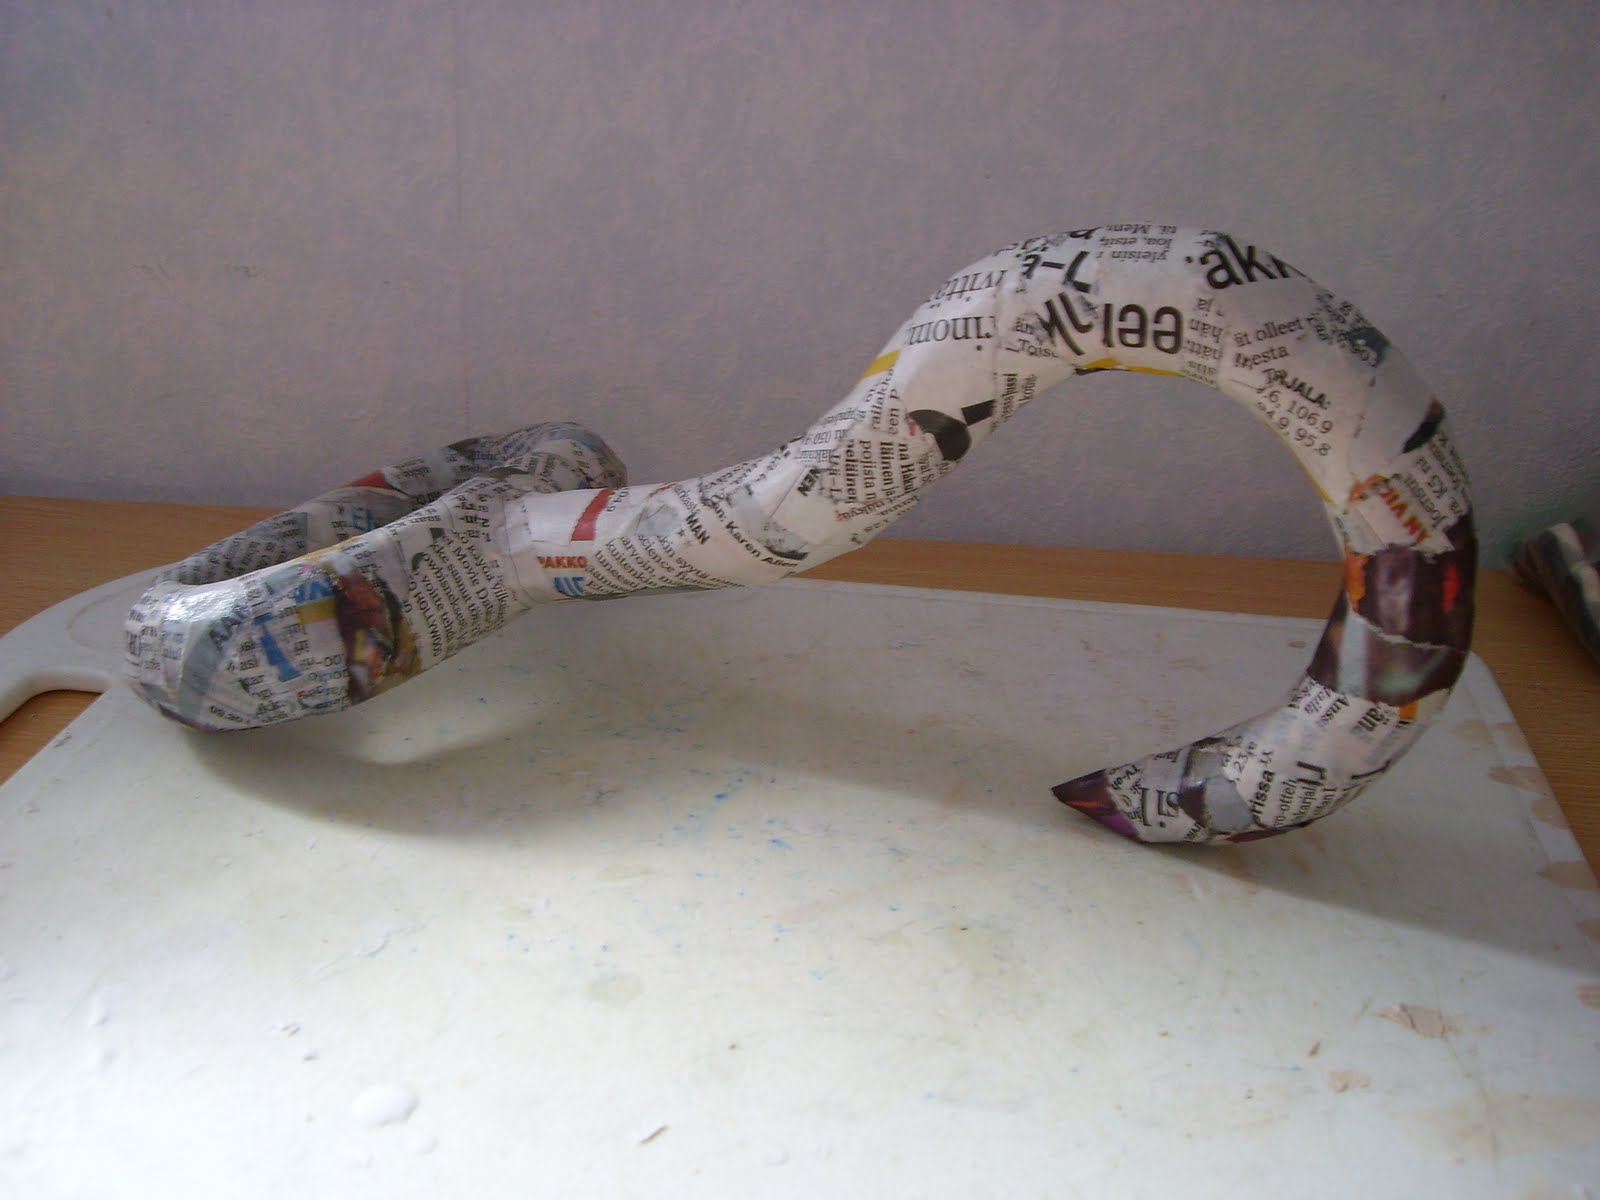
You can use any adhesive you like for this. I just simply mixed together glue and water until I got the consistence I was happy with. It’s always best to start with glue and add water little by little. Ripped pieces of newspaper are dipped in the adhesive and laid on the foam. On curves the pieces need to be small so that they sit properly. Two to three layers will do.


I normally avoid this enforcement technique, because I never seem to get the surface as smooth as I would like to. But because the meat hook can look rough, the few bumps I was able to create didn’t bother me.

4: Coating

For the coating I used water, glue and wood putty in form of a goo. Goo in this case means a spread that is liquid enough to be applied with a brush, but also pasty enough so that it doesn’t drip. I went with gut feeling and didn’t measure anything. I still have to do the other hook, so I try to take notes and add information later about the amounts. The goo will last for few days under plastic.


The goo is spread thinly on the hook. Each layer should be dry before the next. I think I made three to four layers in total. And then it’s done; a meat hook to be painted and weathered.

Notes:

I’m going to paint my hooks with acrylics and will post photos of them when they are done. For the construction; you could use expanding foam instead of insulation foam. The finish could be just putty, but you would probably need to sand it. And if you hate sanding and refuse to do it, you could skip it with the insulation foam; your hook might only look rougher in that case.

October 6, 2010

Make it cheap!

The title seems to be the thought behind my current project. But gladly, when talking about cosplay cheap doesn’t always mean bad. For cosplay, cheap could be lined together with words like innovative, clever or challenging. Well, I don’t know, but for me it has worked well. All together I have spent something like thirty euros to my project. For that money I have managed to construct almost all of the small accessories and pants, bought shoes and acquired most of the materials for a jacket. That’s what I need to start next besides polishing and finishing the items I have already made progress with.


The prop I’ve been putting together is a suitcase. This far I have used cushion board from recycling stack from my work place, half a meter of black cotton, beige curtain fabric from discount, pieces of dark brown pleather, some black rubber band and twenty four studs with glue and acrylic paints. I still need to attach slings, travel stickers and buckles and it should be close to ready.


Making the suitcase has been surprisingly easy. With the measurements you need to be accurate and at times you need to wait glue to dry completely before you can go on, but next to those and using massive amount of tape, piece of cake. If I ever need to do similar prop, I think I will choose poster board instead of cushion board. Some of the inner edges came up little untidy because the board got pressed in. Good thing is that the areas are inside the case and don’t show much.

Now that I think of it, I don’t know why I made the suitcase as operating one… It has never been opened in the series… Damn. Well, for me suitcase is functional even if it’s drawn. And now I have place where to put my stuff at conventions.

Studs for corner pieces painted and weathered with acrylic.

One budget solution occurred to me when I was faced with striping a pair of pants. I pondered between fabric marker and buying tremendous amount of ribbon. I didn’t like the result of the marker, it was bit messy for my taste and I also didn’t feel too good of spending money to ribbon 0,75 euros per meter when I needed almost fourteen. It would have cost almost as much as the fabric for the pants.

The solution is making your own ribbon from scrap cotton and sewing it on the pants before putting them together. It sounds elaborate, but is well worth it. I made stripes which were 0,5 centimetres width. Wider stripes should be easier to pull off and narrower ones should also be possible. I will post later how to do them. I just need to make samples before that, because I didn’t took any pictures when I was working on the pants.

May 11, 2010

Nicknacks coming together


It's a pipe! No... really.

Lately we have been working with the small stuff our costumes require. Yoki started working today on a giant safety pin, as I finished Joxter's pipe. I constructed the shape from modeling material, as the package titled. In the frame I used bent aluminium stick and cork from a deodorant container as seen above. The mouth piece is modified from rubber cork and piece aluminium foil.

I must say that the "modeling material" we are using at the moment smells horrible. Yoki stated that it smells like finger paints, but I strictly disagree. Normally I would have bought modeling clay, but in a rush I purchased this current paste of continuous puking from our local craft store. I'm never making the same mistake again... I'm glad that after I painted the pipe the smell got little milder. It will be really interesting to see, if I can resist the urge of gurning while being photographed.

Joxter's pipe and tobacco pouch.

I also suffered minor casualty, when I stuck the hot glue gun straight to my thumb. Now, I has a blister. I got it when I was working on Muddler's tail, which succeeded extremely well damages taken in concideration. The material on the tail and on Joxter's tobacco pouch is recycled leather. Same stuff is used on Muddler's "head" and ears. I will add pictures of them when they are finished.

Muddler's tail.