August 9, 2013
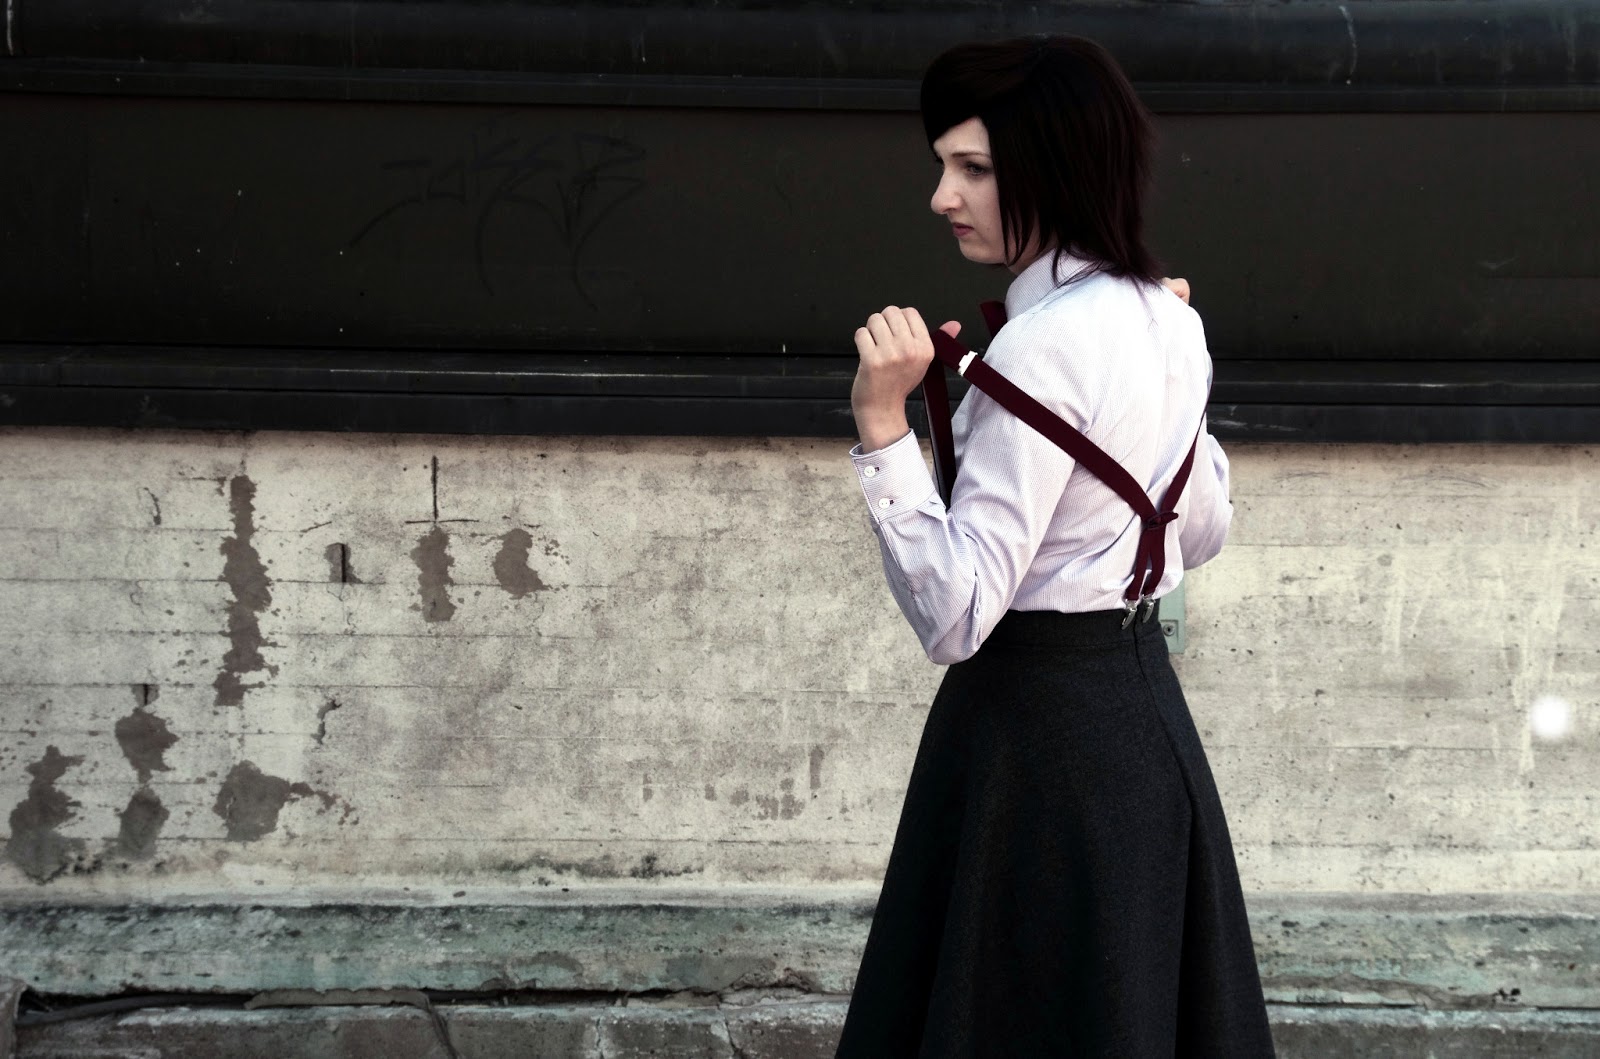
Saya Otonashi from Blood+ at Animecon
Blood+ is a series to which I have returned many times and read through four to five times. I must admit that I have never watched the anime more than few peeks from two episodes. I have formed an opinion based on what I’ve read about the animation, that the plot is more to my liking in the manga with all the misunderstanding and tragedy between Saya and Diva and Diva being more childlike and innocent in her horrible actions.
The high school uniform I made for Saya is a combination from both the anime and the manga. Biggest reason for combining those two was that I couldn’t find suitable track shoes seen in the comic. In the anime Saya has basic walking shoes, which I happened to have in my closet.
The costume itself is pretty basic; pleated skirt and white shirt with red bow. I also made the school bag and had the sword with me which Yoki made for Desucon 2012. I only got few recognitions since the school uniform is so ordinary looking and modest compared to the more better known Saya costume with plum colored jacket and white skirt.
We actually had a competition with Yoki at Animecon. We competed which costume gets more photos taken; my school uniform against her own design. It was a close call... Yoki won by one! I got over it rather quickly, because Fuyu’s costume is really well done and good looking.
We also had this weird encounter with two young guys, who enjoyed the weekend with some refreshing drinks at the park. Against all odds, they were true gentlemen. They asked a permission to pose with us in a photo and made polite questions about the costumes. When I answered which character I was dressed as the other dude saw my fangs, his eyes started to sparkle and he invited me to bite his neck. I laughed and told him that the fake teeth might not be durable enough to do that. He was bit dissappointed, but he still thanked us for saving his day smiling a happy, slightly drunken smile.
All the photos were taken by Yoki. The large quantity is only because she took so many good ones that it was hard to narrow them down only to few!
August 8, 2013
Mikasa Ackerman Cosplay by AZA
Mikasa Ackerman Cosplay by South Korean Coser, I don’t know her real name but I think we can call this cute girl with AZA, actually Aza on this Mikasa Ackerman Cosplay photo look too cute as Mikasa Ackerman, Mikasa is a strong girl (well too strong ^^) with cold expression (even when she joking) and keen eyes.
On this Mikasa Ackerman Cosplay photo AZA look too cute, beside that I think Mikasa did not have a time to use make up like on this Cosplay photo ^^" although so I really love this Mikasa Ackerman Cosplay photo, because Aza has manage to show us A cute side of Mikasa Ackerman, beside that the photography effect made this Mikasa Ackerman Cosplay photo look more alive. Sweet Mikasa.
Sheryl Nome Cosplay by Kohane
Its been a while I post Sheryl Nome Cosplay photo, you can see latest Sheryl Nome Cosplay photo here, and this time the coser behind this cosplay photo is a Japanese girl, her name is Kohane, I found some of her Sheryl Nome Cosplay but for now I’ll post two of her work.
On the first cosplay photo Sheryl Nome wearing a cheongsam, a Chinese traditional dress, I think she look sweet enough with that cheongsam, but I really love the second Sheryl Nome Cosplay photo (not because her cloth) on the second photo Kohane look more similar to Sheryl Nome characteristic beside that her pink hair look more natural than on the first photo, well I got this Sheryl Nome Cosplay by Kohane Cosplay from her WorldCosplay page,. Sweet Cosplay.
Straightening synthetic hair fiber
I like to re-use and –style my wigs, even if I have a tendency to hoard them excessively. For my new project I bought some straight fiber to match my already existing wig. I was disappointed when I opened the package and saw that the presumably straight fiber was anything but straight. I really didn’t have the time to order a whole new wig and had to start a straightening project for kanelon fiber which weren’t heat resistant. I was bit horrified, even if I have straightened synthetic fibers before. Now I needed to style a really sleek and straight wig, when the troll wig was fine being bit frizzy and messy.
I used almost the same method as with the troll wig, with the difference of using gauze instead of pattern paper.
First I took a small lock of fibers and combed then through with a wig brush. Then I sprayed the lock with water and combed it again.
Then I layered the gauze on an ironing board and misted it with water. On the bottom I placed one layer of gauze and two on the top. The gauze which I used was diaper gauze, which is multi-layered compared to regular one-layered gauze. So if you are using regular gauze, be sure to fold it several times.
I set the iron first on nylon setting, but soon increased the heat to silk setting; one point.
Then I placed the fibers beneath the gauze, holding the loop on my fingers. Then I pressed the iron firmly on top of the gauze as close to fingers as I was comfortable with and pulled the fibers under the iron. This I repeated multiple times, with spraying and combing the fibers time to time. Its important not to press the iron too hard, because you don't want to stretch the fiber, only re-shape them.
For some fibers I decided to iron the really annoying half-way loop/fold, especially if you’d like to make the wefts longer than half of the fiber length. It took few extra presses, but finally the fold vanished all together.
After straightening half of the fibers in the package, I sewed the wefts and handstitched them on the wig. After experimenting with iron-on interface, I’m back with sewing the fibers on tulle. I think it’s because my craft skills have improved and I have much more patience than before with wefts.
With straightening the results really depend on how many times you repeat the ironing process. And of course it would be ideal to buy real straight fibers in the first place. My resent purchase from Cybershop was somewhat a surprise, since the first straight fibers I bought from the company before were really silky and smooth. These seemed like crepe fiber, which was carelessly straightened. Gladly I’m a crafty person by nature, so the straightening wasn’t a big effort even it first seemed laborious. I’m still going to continue buying from Cybershop, since their customer service is awesome and this was my first let down in almost seven years.
And here is the wig almost styled, some trimming is still required. I added some length with the wefts and re-styled the whole front with removing part of the skintop and adding long bangs. The wig I used for this project has been seen on Deidara before.
I’m going to make an entry of this "no embroidery for a change, only crafting"- project soon, because... summer holiday! If you have any guesses, feel free to leave a comment!
P.S (Finns) If anyone has problems with keeping wigs on their heads and hasn’t found wig-clips anywhere, Cybershop has three different colors of them and they work miracles! I first used them with Amira’s wig, because regular pins couldn’t support the weight of that massive braid. Also Yoki used them on Fuyu’s wig, since her current Mohawk haircut provides very little fastening surface for pins.
I used almost the same method as with the troll wig, with the difference of using gauze instead of pattern paper.
First I took a small lock of fibers and combed then through with a wig brush. Then I sprayed the lock with water and combed it again.
Then I layered the gauze on an ironing board and misted it with water. On the bottom I placed one layer of gauze and two on the top. The gauze which I used was diaper gauze, which is multi-layered compared to regular one-layered gauze. So if you are using regular gauze, be sure to fold it several times.
I set the iron first on nylon setting, but soon increased the heat to silk setting; one point.
Then I placed the fibers beneath the gauze, holding the loop on my fingers. Then I pressed the iron firmly on top of the gauze as close to fingers as I was comfortable with and pulled the fibers under the iron. This I repeated multiple times, with spraying and combing the fibers time to time. Its important not to press the iron too hard, because you don't want to stretch the fiber, only re-shape them.
On left: the half-way fold after few presses with iron. On right: the fibers with the half-way fold, straight from the package.
For some fibers I decided to iron the really annoying half-way loop/fold, especially if you’d like to make the wefts longer than half of the fiber length. It took few extra presses, but finally the fold vanished all together.
After straightening half of the fibers in the package, I sewed the wefts and handstitched them on the wig. After experimenting with iron-on interface, I’m back with sewing the fibers on tulle. I think it’s because my craft skills have improved and I have much more patience than before with wefts.
On left: wet fibers comparison; straigtened- original. On right: dried fibers comparison: straightened- original.
With straightening the results really depend on how many times you repeat the ironing process. And of course it would be ideal to buy real straight fibers in the first place. My resent purchase from Cybershop was somewhat a surprise, since the first straight fibers I bought from the company before were really silky and smooth. These seemed like crepe fiber, which was carelessly straightened. Gladly I’m a crafty person by nature, so the straightening wasn’t a big effort even it first seemed laborious. I’m still going to continue buying from Cybershop, since their customer service is awesome and this was my first let down in almost seven years.
And here is the wig almost styled, some trimming is still required. I added some length with the wefts and re-styled the whole front with removing part of the skintop and adding long bangs. The wig I used for this project has been seen on Deidara before.
I’m going to make an entry of this "no embroidery for a change, only crafting"- project soon, because... summer holiday! If you have any guesses, feel free to leave a comment!
P.S (Finns) If anyone has problems with keeping wigs on their heads and hasn’t found wig-clips anywhere, Cybershop has three different colors of them and they work miracles! I first used them with Amira’s wig, because regular pins couldn’t support the weight of that massive braid. Also Yoki used them on Fuyu’s wig, since her current Mohawk haircut provides very little fastening surface for pins.
August 7, 2013
Kawaii Karuta Roromiya Cosplay by Mon
I never think Karuta Roromiya Cosplay can be this Kawaii, unlike her lates Karuta Roromiya Cosplay photo now we can see Mon wearing a sweet pink sweater that make her 100x time kawaii-er that before, I prefer this Karuta Roromiya Cosplay photo than her previous Karuta cosplay.
I really love the pinky sweet sphere on this Karuta Roromiya Cosplay photo, i think in this Cosplay photo i Mon was not just manage to show kawaiines of Karuta Roromiya but also show us a mature version of Karuta Roromiya Character, beside that i really love her hair too, nice natural hair. if you don't know whos Karuta is,..she is main character from Inu X Boku SS anime.
Monkey D Luffy Cosplay by Deicn911
Its really hard to find great Monkey D Luffy Cosplay photo, you know I think its hard to mimic Luffy face characteristic and look fits with his personality, well at least I think Deicn911 really did great on this Monkey D Luffy Cosplay photo, although she’s a girls but she look really fits as Luffy character, also check Boa Hancock Cosplay.
Yea I know, on this two Monkey D Luffy Cosplay photo he’s not showing his face to us, but trust me Deicn911 is fits enough as Luffy I have many of her Monkey D Luffy Cosplay photo that will make you guys fall in love with luffy, I believe that guy with that black hat and blue blazer are Sabo-san, a long lost Luffy and Ace’s friend, well I got this Monkey D Luffy Cosplay by Deinc911 from her worldcosplay page. Love it.
August 5, 2013
Haku Cosplay Photo by Mon
After Singeki No Kyojin and Karuta Roromiya Cosplay photo now we got another kawaii cosplay from kawaii coser Mon, and this time she is cosing as my first favorites character on Naruto Anime series Haku (although till now i am not sure about her gender), on this Haku Cosplay photo Mon really pretty and look fits enough as the character she cosing...the best part is now im sure on this Haku Cosplay photo she is a girl.
Yea i really love this character because Haku has a sweet face and cold expression but when my friend told me that Haku is a guy! Thats ruining everything on my imagination Lol. What i really like from this Haku Cosplay photography is she look really pretty with a droping soft light from her back, and in the second Haku Cosplay, although i don’t like to see Haku’s death but the photography was manage to bring dramatic atmosphere in to this Haku Cosplay photo. Great work.
League of Legends Cosplay by Lolcos
I’ll tell the truth, i don’t know much about this League of Legends Cosplay photography, i don’t know the name of this character and also actually i don’t know whos the coser behind this awesome League of Legends Cosplay photo, beside that i already forgot from where i got this cosplay photo ^^”, so sorry for not including the coser name or the owner of this League of Legends Cosplay photography.
Well all i know is...this is one of the character from famous multiplayer online games League of Legends, i never play this game but this game surly famous among online gamers, i know some cute and smexy character from League of Legends such as Ahri, Annie and Sona.
Well its suck i don’t know whos the coser behind this stunning League of Legends Cosplay photo. But they are really awesome on playing with nice costume and photography effect.
August 4, 2013
Karuta Roromiya Cosplay : by Mon
After cosing as Christa Renz (from Singeki No Kyojin) now we can see Mon on her Karuta Roromiya Cosplay from Inu X Boku SS anime series, well i don’t know much about this anime... so let’s skip about this anime prologue, if you want to know about this anime just find out by yourself OK!, well...as well as her Shingeki No Kyojin Cosplay she also look great and Super Kawaii on this Karuta Roromiya Cosplay photo.
One thing that i know from Karuta Roromiya is,..she love Pocky, because in most Karuta Roromiya Cosplayphoto we’ll always see Pocky there, well Mon really look kawaii with that maid Costume and pinky hair, i don’t know how fits Mon as Karuta Roromiya but if you asking how kawaii she is? She got 8 from 10 (from me :D), i still have her Karuta Roromiya Cosplay photo but i’ll save that for next post. I got this Karuta Cosplay by Mon from her worldCosplay page. KawaiiI~~
Boa Hancock Cosplay : by Deicn911
This time I got another Boa Hancock Cosplay by Deicn911, this is not my first time i post Boa Hancock Cosplay photo by Deicn911 on MyAnimeGirls.Blogspot.com, you can find her another One Piece Cosplay Here. Actually Deicn911 is one of few coser who look fits as Boa Hancock character, you know it’s hard to cosing as pretty, smexy but still look strong, and Deicn911 has all of that.
On this Boa Hancock Cosplayphoto she married with luffy, wait is that possible? I don’t think luffy interested on before he become a pirates king, well whatever, i think they really enjoying Boa Hancock’s wedding but i’m sure luffy won’t share his wedding cake, that why they chasing him Lol. Well although this is not my favorites Boa Hancock Cosplay but Deicn911 really made Boa Hancock’s dream came true.
August 2, 2013
Singeki no Kyojin Cosplay : Christa Renz
This is it!... another Shingeki No Kyojin Cosplay photo from Mon, I think this is my first time I post her cosplay photo on this MyAnimeGirls.blogspot.com, but actually I already have many of her Shingeki No Kyojin Cosplay photo on my PC, she’s cosplaying as one of Racoon Corps member Christa Renz, she look really weak XD but she got a guts for joining Racoon Corps.
Shingeki No Kyojin anime is also known as Attack on Titan (in english), SNK is really awesome anime with a nice plot story and stunning animation, I really love to see Mikasa flying around with her 3D gear XD I bet she fly faster than USA’s F22, she look sooo cool.
Shirahoshi Hime Cosplay by Deicn911
What do you think about this Shirahoshi Hime Cosplay Photo by Deicn911?, if you think this is the best shirahoshi cosplay you should check this Shirahoshi Cosplay Photo too, you will have a hard time to decide whos the best ^^.
Well this time the coser behind this Shirahoshi Hime Cosplay is one of my favorite coser Deicn911, she really have a sweet and innocent face that make even more fits as Shirahoshi character, actually I prefer Badian-dian as Shirahoshi, she got a natural innocent expression in her Shirahoshi Cosplay photo. Actually badian-dian always look fits when she cosing as innocent
July 30, 2013
The Best Naruto Cosplay (sofar)
This is the best Naruto Cosplay photo so far i have ever seen, i dont know why but its really hard to find Naruto Cosplay photo that suitable with my imagination about naruto character, most of Naruto cosplay always look more cuter or to ugly for naruto, but this one the coser look fits enough as naruto beside that i really like his expression, but sadly i don't know their name i found this Naruto Cosplay randomly from internet.
There is another coser too on this Naruto cosplay photo, they are look really sweet with their cosplay costume, and look fits enoug, except for Sasuke and sei cosplay XD not sure why but they're ruining my imagination about Sasuke and sei. well whatever, i know how hard to make ourself look like people's favorites character. good work guys!!
Singeki No Kyojin : Anni Leonhart Cosplay
Singeki No Kyojin Cosplay by Hana, after she manage to make Mikasa alive on her previous Cosplay photo (and make me fall in love with mikasa once again) this time we can see Anni Leonhart Cosplay photo by her, I actually feel Anni Leonhart cosplay would look more real if it is the European coser, because Anni Leonhart has a nose that is too unique to asian girl ^^.
Well at lease Hana has manage to make Anni Leonhart character more cuter that the original one (Anni always look scary with her serious face on anime), i really her proff and costume on this Anni Leonhart Cosplay photo, thats really look like a real one and also her blond hair look really pretty on Hana. i love it.
Back to MyAnimeGirls home
July 11, 2013
Animecon is closing in
For first time in years we managed to pull ourselves together and attend to two summer conventions. We both had this particular weekend free and couldn’t think anything better to do. Animecon is just few nights away and we are… ready! Okay, almost ready since we still need to sew few wig clips.
With characters we chose the easy road and decided to recycle. Yoki picked Fuyu, who she portrayed the first time last spring at Desucon Frostbite. The costume includes a full length linen robe, but Yoki left it out because we are going to travel to Kuopio with train for change and linen and tight packing don’t mix. I'm afraid that also the staff seen in the photo below has to stay at home, because our ride back will be even more cramped.
I chose Saya from Blood+, but the wig is basically the only part I’m reusing. Everything else I sewed during these last weeks. I have always dreamt of making a school girl costume someday and now I managed to fulfill that dream! Saya's high school outfit contains dark pleated skirt, white shirt and red bow.
I also made the school bag for Saya based on what I could get out of the design from few frames in the anime episodes. I think it’s always better to have character loyal item to carry your stuff in and it was actually my turn to be the item holder... And I love bags.
With Saya I also was able to craft new teeth the similar way I made our troll teeth last year. I accidentally deleted the photos from the making process even if I had thought of writing an entry about them. Now with new photos I can correct my mishap in the future.
We are really looking forward to this weekend! There is so many programs we want to see and we both have carefree costumes and I'm going to bring my camera and try to recall how to take photos and it's going to be nice weather and nice people and hotel breakfast... I could go on forever, but maybe I continue after the convention. See you at Animecon!
With characters we chose the easy road and decided to recycle. Yoki picked Fuyu, who she portrayed the first time last spring at Desucon Frostbite. The costume includes a full length linen robe, but Yoki left it out because we are going to travel to Kuopio with train for change and linen and tight packing don’t mix. I'm afraid that also the staff seen in the photo below has to stay at home, because our ride back will be even more cramped.
Photo: Esa Ala-Petäys
I chose Saya from Blood+, but the wig is basically the only part I’m reusing. Everything else I sewed during these last weeks. I have always dreamt of making a school girl costume someday and now I managed to fulfill that dream! Saya's high school outfit contains dark pleated skirt, white shirt and red bow.
I also made the school bag for Saya based on what I could get out of the design from few frames in the anime episodes. I think it’s always better to have character loyal item to carry your stuff in and it was actually my turn to be the item holder... And I love bags.
With Saya I also was able to craft new teeth the similar way I made our troll teeth last year. I accidentally deleted the photos from the making process even if I had thought of writing an entry about them. Now with new photos I can correct my mishap in the future.
We are really looking forward to this weekend! There is so many programs we want to see and we both have carefree costumes and I'm going to bring my camera and try to recall how to take photos and it's going to be nice weather and nice people and hotel breakfast... I could go on forever, but maybe I continue after the convention. See you at Animecon!
July 9, 2013
Eleventh Doctress photoshoot 1/2
Summer seems to be the simplest time of the year to organize a photoshoot. People have so much free time on their hands, like we had. And Sunday is the perfect day to pick! There was absolutely no one anywhere when we head out for the shoot!
Our first location for the Doctress was a small rooftop parking lot. The photographer of this shoot was Karan-chan who was with us on our Lady Bot shoot two years ago and Yoki was the fez holding assistant. The rooftop is the first part of the photoshoot. I decided to split the shoot in two, because there were over 300 photos to choose from.
The Eleventh Doctress was a costume I made last year and wore the first time at Desucon Frostbite, 2013. The costume itself I constructed based on the outfit the 11th introduces himself in. I just can’t get over that look! It's brilliant!
Even if I made the costume some while ago, I still find some things I would like to add or fix, like the red stripes on the cuffs and the golden wristwatch. Actually I have the watch; I just forgot to wear it. But I had the journal and sonic screwdriver to fill the void.
We took a bunch of running photos. With the heat, wool jacket and stockings it wasn’t the most brilliant idea, but each photo turned out great! It was hard to pick only one! Karan laughed that in each frame my arms and legs had changed position, but face was like frozen in time!
Subscribe to:
Posts (Atom)